
YOUR HOME. YOUR NEXT CHAPTER.
Give every opening a clear place in the plan.
Use one opening-by-opening worksheet to compare retained materials, window work, surrounding siding and unresolved decisions. Bring the record to Accent so the combined proposal can identify what is included at each location.
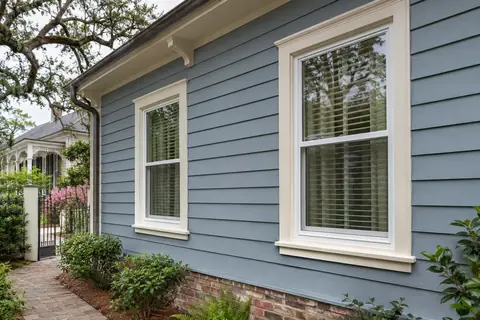
Use this record alongside the service discussion.
A combined exterior project can look straightforward on an elevation photograph while containing several different scopes. One window may remain, another may be replaced, and the surrounding siding may stop at retained brick. This worksheet gives those differences a consistent reference. Its useful output is a dated list of openings and decisions that can be compared with a proposal, rather than another collection of product photographs.
The siding service page and replacement window service page explain the relevant options. This page supplies the record you can prepare before asking about them together. It does not select an installation method, establish hidden wall conditions or replace the measurements and assessment the actual property requires.
Assign a reference that everyone can recognize.
Start with one side of the house and use room names plus a short label: front living room F1, front bedroom F2, side kitchen S1. Keep those labels on photographs and subsequent notes. Describe the side by a recognizable feature when compass directions are uncertain. If two windows serve the same room, add left and right as viewed from outside so an order or change does not silently switch locations.
Photograph the wider wall and each opening safely from the ground. Include the surrounding trim and the transition to the next surface. Date the record and keep a copy before making later edits. A consistent reference is more useful than a perfect drawing; leave measurements marked unverified until the responsible professional confirms them. Do not remove siding, trim or window components to complete the inventory.
Copy these fields for each opening.
Use the following compact record in a note, email or spreadsheet. Repeat it for each location and leave genuinely unknown items open. A short answer attached to a clear opening reference is easier to review than a paragraph that mixes three sides of the house.
- Opening reference and photograph
- Room, side of house, label and dated photo name.
- Current observation
- Operation, visible staining, finish concern or desired appearance change.
- Window decision
- Retain, assess replacement or unresolved; proposed product only when confirmed.
- Surrounding wall and trim
- Existing surface, proposed siding area and pieces requested to remain.
- Included finishing and responsible party
- Who is to confirm preparation, trim, interior disturbance and final finishing in the written proposal.
- Open question and decision date
- What must be answered, by whom and which dated scope records the answer.
These fields describe decisions and responsibilities. They are not an installation checklist or a homeowner approval of concealed work. Attach the record to the discussion and ask which details need assessment before a price or sequence can be confirmed.
Separate what stays from what changes.
For each opening, list the window, exterior casing, interior trim and surrounding wall finish separately. Use retain, replace, assess or undecided for each item. This prevents a request to retain attractive casing from being confused with a decision to retain the window itself. Explain whether matching an adjoining opening matters and whether a finish sample is needed before agreement.
Describe visible concerns without assigning a cause. Staining beside a frame, a difficult sash or damaged trim may require different investigations. Ask how the proposal handles conditions that cannot be confirmed before work begins. Keep the response beside the relevant opening instead of treating an allowance elsewhere in the estimate as an answer for every location. The window planning guide provides broader product and installation questions.
Walk through a sample row before completing the house.
An example entry might read: F1, front living room, photo front-01; difficult operation reported; assess window replacement; retain adjoining brick; assess painted casing; interior finishing not yet assigned. The open question is which surrounding pieces the proposed method disturbs and who includes their finishing. This is an illustrative entry, not a finding about an Accent customer’s home or a recommendation for a particular installation.
After the assessment, add the answer and reference the dated proposal or revised scope where it appears. Keep the original observation readable. If the response is still conditional, record the condition rather than marking the opening finished. Complete the remaining rows using the same approach. The value comes from having one traceable record for every affected location, including openings where the decision is to retain the existing window.
Ask for the connection between the two scopes.
Review a representative opening with Accent and identify which party confirms the proposed window installation, adjacent wall preparation, exterior trim and finishing. Ask where the written siding scope begins and ends around it. The answers should fit the selected products and assessed conditions. A homeowner inventory cannot determine fastening, flashing, drainage or other installation details from a finished photograph.
When more than one provider is involved, ask how they will coordinate the shared work and communicate a change before the next stage proceeds. Record the agreed contact and the documents that govern the decision. Avoid filling an uncertain responsibility with an assumption that another trade will handle it. For a project involving several exterior systems, use the whole-home exterior overview to organize the wider scope alongside this opening record.
Compare proposals against the same opening list.
Keep the same reference labels when comparing estimates. Check whether each affected location appears, which window and surrounding finishes are included, and which items remain optional or excluded. A lower total may reflect fewer openings or a different finishing scope. Mark those differences on the worksheet before comparing price. Ask for clarification where a general phrase does not identify the work expected at a specific location.
Add separate lines for connected work that belongs outside an opening row, such as a full wall area or access arrangements. Keep them linked to the appropriate elevations. Do not add all allowances into one unlabelled number or assume a product warranty covers every adjacent finish. Ask for the actual applicable warranty information and keep it with the agreed scope. The record supports a clearer comparison without promising a particular price or result.
Record changes before the next decision depends on them.
If a material, retained component or opening scope changes, update its row with the date, reason and proposal revision. Keep the previous version so the change remains understandable. Ask who needs the revised information before related work proceeds. A different casing or a decision to replace a previously retained window can affect connected selections even when the general appearance goal stays the same.
Use the worksheet again at the project review to identify unresolved items and the records to retain. Ask for care information, relevant product details and a contact for questions within the agreed scope. Preparing this inventory does not guarantee that every concealed condition is known. It gives everyone a shared reference for discussing the work, recording assessed decisions and recognizing when the written scope needs an update.
Send a useful assessment brief.
Begin with the property location, your completed opening list and a few clear wide photographs. State which siding areas and windows you want discussed together, which finishes you hope to retain and your main reason for combining the work. Identify known repairs and uncertainty rather than guessing at missing details. Keep timing preferences separate from a requested installation sequence so the appropriate approach can be assessed first.
Use the Windows estimate route below to start the conversation and explain the linked siding work in the project details. You can also choose the Siding route if that is the main scope. Both lead to Accent’s actual estimate form. Keep the worksheet available for follow-up questions and the proposal comparison. For a different objective, return to the project-goal collection and choose the guide that matches the decision you are making.
GOOD QUESTIONS. CLEAR ANSWERS.
Your opening worksheet questions.
Use these answers to prepare for a conversation about your own property.
YOUR PROJECT · YOUR NEXT STEP
Turn your project ideas into a clear next step.
Share your project and city or ZIP. Accent can discuss the existing space, your priorities and the details needed for an estimate.
- Share your project
A short request. Phone or email. No account needed.
- Review scope and estimate
Discuss the assessed work, materials, preparation and exclusions.
- Approve and plan the work
Confirm the agreed scope and installation arrangements with Accent.
Your request starts a conversation. You approve the work before installation.
