
FIND THE FINISH THAT FITS
Hardie lap siding. Horizontal lines. A more considered exterior.
Plan James Hardie lap siding around the shape of your walls, the windows you are keeping and the appearance you want from the street. Use this guide to prepare the horizontal siding layout and selection brief, then discuss the assessed installation scope with Accent.
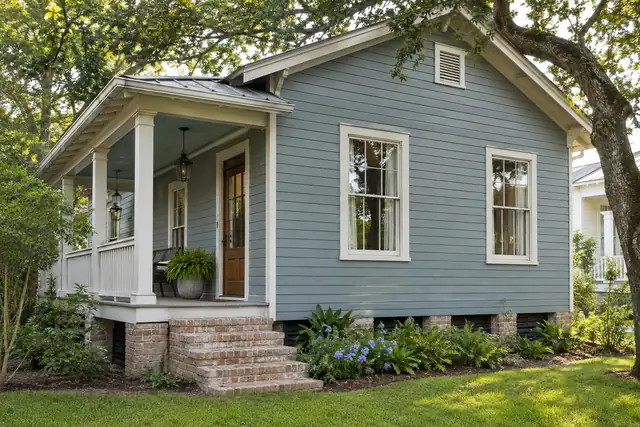
Start with the horizontal pattern you want to see.
Horizontal siding creates a repeated line across the wall. Before choosing a color, look at how that line would relate to the width of the house, the height of the windows and the depth of the porch. Take one photograph from the street and another from the front walk. The first helps compare the whole elevation; the second makes the trim and individual courses easier to discuss. Mark the walls included in your request rather than treating a photograph of one attractive corner as a brief for the entire home. James Hardie identifies Hardie Plank as its lap-siding product family. Confirm the actual profile and availability for your project before a selection becomes part of the proposal.
Compare exposure using the same wall and viewpoint.
The visible height of a siding course changes the number of horizontal lines you see. Ask to compare the proposed appearance on the same elevation instead of switching between unrelated houses. A broad wall with few openings can read differently from a narrow wall interrupted by several windows. Keep the roof, porch posts and retained brick visible in the comparison. Write down the actual proposed product and exposure when these are confirmed. A descriptive preference such as fewer, calmer lines is a helpful starting point, but it should become a specific selection before ordering. The layout must still follow the applicable product guidance and the assessed wall conditions; a homeowner sketch is an appearance brief, not an installation specification.
Make the window relationships deliberate.
Look at the lower and upper edges of the windows as well as the siding between them. Ask how the proposed course layout will be reviewed across openings, corners and adjoining walls. Where existing windows sit at different heights, mark that condition rather than assuming the siding can disguise it. Keep the casing widths and any sill details in the same discussion. You may prefer a quiet surround that lets the horizontal pattern continue visually, or stronger trim that frames each opening. Neither choice should be made from a cropped sample alone. If windows may also change, use the linked opening schedule to identify which units remain and which need assessment before the siding layout is finalized.
Choose a texture and finish beside retained materials.
Bring the shortlisted siding samples outside beside the parts of the exterior that will stay. The roof, brick foundation, porch floor and window finish can change how a color appears. Compare the samples in more than one light condition and record the product references behind the choice. A phone image is useful for explaining a direction, but screen settings and the surroundings in the photograph can alter the impression. Ask which texture and finish choices are actually available for the specified product in your area. Keep the main wall selection separate from the corner, opening and roof-edge trim decisions so the proposal does not rely on a general phrase such as white trim to describe several different components.
Define returns, corners and the lower wall boundary.
A horizontal siding project needs a clear stopping point. Identify the porch returns, side walls and small recesses that belong in the work, including areas less visible from the street. Mark where the siding meets retained masonry, an adjoining addition or another exterior finish. These boundaries affect both the appearance and the actual scope. Show landscaping, walks and steps near the bottom of the wall during the assessment so the required details can be considered for the selected system. Do not choose a lower edge simply because it produces an attractive line in a reference image. Ask Accent to identify the proposed transitions and the current manufacturer guidance that applies to the actual product and property.
Separate the horizontal design from preparation work.
A neat course pattern does not describe the condition behind the existing siding. Tell the assessment about earlier repairs, recurring staining and any opening where the concern changes after rain. Keep those observations tied to wall labels and photographs without assigning a cause yourself. Ask which preparation can be assessed before removal and what remains uncertain. The proposal should explain how additional findings will be documented and brought back for a decision. This keeps a design approval from being mistaken for approval of an undefined repair allowance. The main Hardie installation page covers the wider service discussion; this guide helps the horizontal layout and product selections stay specific within that broader project.
Compare proposals with a course-and-trim record.
Use one short record for each elevation: wall label, proposed lap product, confirmed exposure, finish reference, retained openings and included trim. Add a separate line for porch returns or adjoining areas when their treatment differs. Then compare proposals against those same locations. A total that covers only the front wall should not be compared directly with one that includes side elevations and connected trim. Check whether removal, disposal, preparation, accessories and finishing are included or excluded. Keep optional work distinct. Ask for a revised record when a selection changes so the color or profile shown in a later discussion can still be traced to the agreed scope rather than to an earlier sample photograph.
Keep the finished appearance practical to care for.
Ask for care information for the actual installed siding and finish, together with the applicable written warranty documents. James Hardie cautions that high-pressure washing can damage its siding and recommends gentler cleaning methods in its current care guidance. Keep product-specific instructions available rather than applying the same cleaning routine to every exterior surface. Discuss nearby planting, irrigation and the roof runoff that reaches the wall as part of normal exterior upkeep. During the final project review, look at the agreed elevations from a normal viewing distance and discuss any unresolved scope items using the same wall labels. A beautiful horizontal pattern is easier to maintain when the selected products and their care records are easy to identify.
Send a lap-siding brief that can become a real assessment.
Include the property location, wide photographs, the elevations you want included and your preferred horizontal appearance. Add sample references when available, explain which windows and brickwork remain and identify other exterior work being considered. For example, a useful design note might request a calm horizontal pattern on the front and left elevations, retained white windows and brick piers, with porch returns included for comparison. That is an illustrative brief, not a description of a completed Accent job. The next step is to confirm the existing conditions, suitable product choices and written installation scope for your own home. Use the siding estimate route below and keep the notes available for follow-up.
GOOD QUESTIONS. CLEAR ANSWERS.
Your hardie lap siding planning questions.
Use these answers alongside the selections and conditions for your own property.
YOUR PROJECT · YOUR NEXT STEP
Ready for new siding?
Share your project and city or ZIP. Accent can discuss the existing space, your priorities and the details needed for an estimate.
- Share your project
A short request. Phone or email. No account needed.
- Review scope and estimate
Discuss the assessed work, materials, preparation and exclusions.
- Approve and plan the work
Confirm the agreed scope and installation arrangements with Accent.
Your request starts a conversation. You approve the work before installation.
