
ACCENT HOME IMPROVEMENTS
Siding project brief. Give every wall a clear plan.
Get a siding conversation started with a clear description of your house. This project brief brings the walls, observed concerns, materials you want to retain and preferred appearance into one record. You can complete it before knowing the right installation solution. Accent can then discuss the assessment and offered siding options for the property.
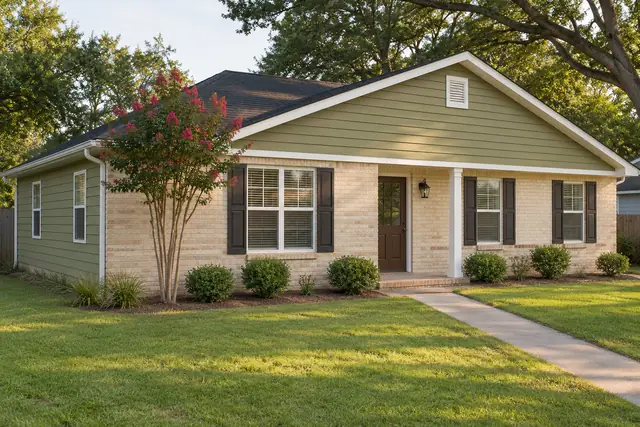
Give each wall a name you can reuse.
Begin with a simple outline of the house and a broad photograph of each accessible elevation. Use labels that make sense to the household, such as front, driveway side, rear patio wall and garden side. Add a short identifier for an upper gable or separate addition if it needs its own discussion. Put the same label in the photograph filename and in the brief. A reviewer should be able to connect a written concern with its location without guessing which side of the house you mean. Do not measure inaccessible areas or climb to improve the record. Rough orientation is enough for the first enquiry. The assessment can establish dimensions and installation requirements later. Keep the property address at the top so the wall record remains connected to the correct project.
Separate what you see from what you think caused it.
For each wall, write a short observation in ordinary language. You might record a loose-looking piece beside the rear door, a visible gap below a window or an area with a different finish from the surrounding siding. Say when you first noticed the condition and whether you have an older photograph. Keep any suspected cause in a separate question. A photograph and homeowner note cannot establish the condition behind the wall or prescribe the repair. Ask Accent what can be assessed from the initial information and what needs a property visit or further investigation. This approach makes your concern concrete without locking the conversation into an unverified diagnosis. If an area cannot be seen from a safe accessible position, mark it as not observed rather than assuming it matches the wall below.
Mark replace, retain and discuss as three separate choices.
Work around the exterior labels and give each item one of three provisional instructions: you want it considered for replacement, you hope to retain it, or you need advice. Include brick, existing siding, trim, shutters and other visible finishes that affect the proposed boundary. A wish to keep an item is a planning preference until its suitability and connections have been assessed. State where a proposed new material would meet a retained one, especially at a corner or at the edge of a selected elevation. Ask the proposal to identify those interfaces. You can change the preference after discussing the options. Keeping it visible from the beginning reduces the chance that two people use siding replacement to describe different amounts of work at the same house.
Describe the appearance with a small set of priorities.
Choose two or three outcomes that matter most: a calmer front elevation, a different horizontal profile, a vertical accent or a trim color that works with retained brick. Attach a reference photograph if it helps, then identify the particular feature you like. The reference may show a different house, product or lighting condition, so keep it as a preference until offered samples and the actual wall layout are reviewed. The fiber-cement and vinyl comparison guide can support the material discussion without turning this brief into a product ranking. Ask which selections can be considered for the assessed scope and what information will identify the final choice. Keep alternative colors or profiles in a clearly marked options section until one is selected. That prevents a saved inspiration image from being mistaken for an agreed specification.
Identify openings and connected work that need coordination.
Mark windows, doors and other wall features that sit inside the proposed siding area. Note whether you expect them to stay and whether a separate replacement enquiry is already underway. A simple identifier, such as driveway bedroom window, may be sufficient at this stage. If the project includes many openings, use the siding and window opening worksheet as the detailed record and refer to its identifiers here. Also mention adjoining soffit, fascia, gutters or a patio connection that may affect the discussion. Listing a connected item does not put it into the siding price. Ask which interfaces are included, which are retained and which require separate assessment or responsibility. Keep those answers with the wall label rather than assuming that every nearby component will be removed and reinstalled as part of one general task.
Add the practical details that affect an assessment.
Describe how someone reaches the proposed work areas, where a gate is located and whether the house is occupied. Mention a narrow side passage, a regularly used entrance or a household arrangement you need to discuss. Identify an important deadline without presenting it as an installation date already agreed. Put access questions in the brief so they can be considered alongside the walls and materials. You do not need to plan equipment placement or clear the property before the next step is confirmed. Ask what information and arrangements are actually needed. The siding timeline guide develops schedule milestones; this brief only records the household constraints and decisions that the schedule discussion needs to know. Keeping those roles separate makes the first message useful while leaving the detailed work sequence for the assessed project.
Use a repeatable wall entry rather than a long email.
For each elevation, complete the same six prompts: location label, visible observation, desired outcome, parts to retain, connected work and question for assessment. For example, a fictional entry could describe the rear patio wall, an uneven-looking finish, interest in a consistent new profile, a wish to keep the adjoining brick, a retained door and a question about the proposed boundary. That is an example of how to organize information, not a documented Accent job or an assessment of a material. Add the related photo names beside the entry. If a prompt does not apply, write none identified or not yet known. A concise completed record is more helpful than confident guesses added to fill every line. Keep a date and version at the top when you revise it after a conversation.
Carry the brief into the written scope conversation.
The brief states what you are asking about; the assessed proposal establishes the work being offered. Compare them using the wall labels. Check the included elevations, product identification, trim and finish boundaries, removal, preparation assumptions, retained items and any separate work. Ask how unconfirmed conditions or later requested changes would be addressed. James Hardie's homeowner planning guidance supports reviewing samples and putting the selected project scope in writing; it does not establish Accent's product availability or your contract terms. Send Accent the brief with a few clear photographs and ask for the next assessment step. Keep the questions that remain open beside the current proposal. Once choices are confirmed, update the record so it distinguishes your early preferences from the scope and selections actually agreed for the house.
GOOD QUESTIONS. CLEAR ANSWERS.
Your siding project brief questions.
Use these answers alongside the assessed conditions and choices for your own property.
YOUR PROJECT · YOUR NEXT STEP
Ready for new siding?
Share your project and city or ZIP. Accent can discuss the existing space, your priorities and the details needed for an estimate.
- Share your project
A short request. Phone or email. No account needed.
- Review scope and estimate
Discuss the assessed work, materials, preparation and exclusions.
- Approve and plan the work
Confirm the agreed scope and installation arrangements with Accent.
Your request starts a conversation. You approve the work before installation.
