
ACCENT HOME IMPROVEMENTS
Before and after planning. Decide what the change needs to show.
Build an honest starting record and a clear list of desired changes. Use real project examples for inspiration while keeping your own property, retained features and assessment questions at the center.
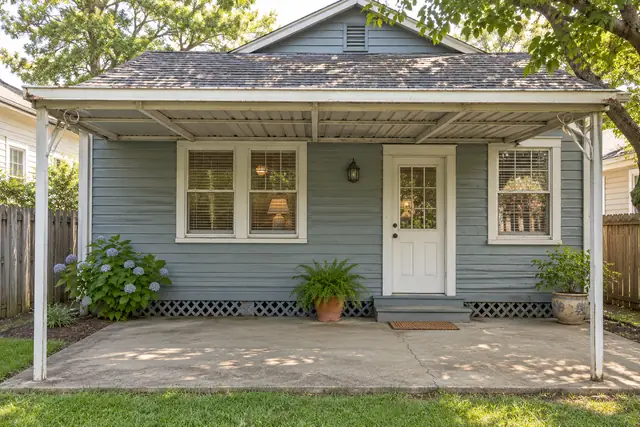
Choose the change that matters to your household.
Before collecting dramatic transformations, write what you want your own exterior to do better. You might want a clearer relationship between siding and retained brick, a more useful patio area or a finish arrangement that feels considered beside existing windows. Name the property area and the desired result together. A useful before-and-after plan begins with that purpose, not a promise that another home’s photograph can be reproduced. Keep ordinary use in the description if it matters: where you sit, enter or look into the yard. Identify the qualities you already like as well as the things you want assessed. The starting record should help the household recognize a useful change, including the features that are supposed to remain part of the final appearance.
Create a truthful existing-condition baseline.
Take a wide photograph of each relevant area from a position you can safely revisit. Keep the original file and add a date and short label. Include enough of the roof edge, wall, openings and ground-level context to understand the area. A closer image can record a specific finish or visible concern, but it should sit beside the wide view. Avoid cleaning up the digital image, removing inconvenient objects or changing colors to make the starting condition look different. If a photograph has been edited or is an illustrative reference, label it accordingly. The purpose of the baseline is to preserve what the property looked like at the time, giving the assessment and later household review a clear and honest common reference.
Mark what changes and what stays.
On a copy of the wide photograph or a simple sketch, label the requested work and the items you expect to retain. Keep the unmarked original. A wall update may leave brick, windows, doors and parts of the trim in place; a patio change may retain the slab, route and adjacent wall. Make those choices visible. If an item’s status is undecided, use that label rather than hiding it behind a colored overlay. Ask which boundaries and interfaces need assessment before the desired change can be described as an offered scope. The marked copy is a communication aid, not a construction drawing. It helps the household understand the proposed change without accidentally presenting every visible feature as included in the work.
Use actual project examples with their context.
Look through Accent’s completed-project gallery for details that communicate your preferences. Identify the specific feature you enjoy, such as a trim relationship, a cover line or the balance between brick and siding. Keep the example’s identity separate from your own property record. A genuine completed-project image can show that particular project’s appearance; it does not by itself establish which product, scope or arrangement fits another house. Representative planning artwork serves a different purpose and should remain identified as such. Do not turn it into a claimed customer before-and-after sequence. Bring a small set of useful references and explain each one. That gives the assessment a clearer preference record than a large folder of attractive homes with no indication of what the household actually wants considered.
Describe the desired result without inventing hidden work.
Write the visible result in practical language: the wall area whose finish you want to discuss, the retained opening relationship or the patio activity you want the arrangement to support. Keep unseen conditions as assessment questions. A smoother or more attractive photograph cannot establish what lies behind a wall, which preparation is needed or how a connection should be made. If a visible concern prompted the enquiry, preserve the detail image and describe the observation factually. Ask how the offered scope addresses the assessed condition. This keeps the planning conversation grounded in the property and prevents an appealing result image from becoming an assumed technical solution. The household can be clear about the desired outcome while leaving construction decisions to the appropriate assessment.
Choose comparison viewpoints that remain useful.
For a later record, note where you stood and which area the wide photograph shows. A doorway, fence corner or patio edge can help you find the same general viewpoint without needing a precise camera setup. Record the date and any obvious change in light or weather when taking follow-up images. Do not claim an exact visual comparison if the angle, crop or surroundings differ substantially. Detail photographs can supplement the wide view, especially where the offered work concerns one limited area. The goal is a readable record of the actual change and the retained features. It is more useful to explain a difference in viewpoint than to force two photographs into an apparently identical pair by editing away inconvenient context.
Compare the proposal with the marked baseline.
Keep the starting photograph, requested changes and current offer together. Check which areas and materials are included, what remains and which questions are still open. Ask how the desired appearance has been translated into the actual proposed products and work. If an inspiration image shows a feature absent from the offer, identify it explicitly before assuming it is included. Keep exclusions beside the relevant part of the marked baseline. Where the scope changes, save the earlier version and date the revised record. This creates a plain history of the decision without claiming that an early visual preference was a final design. The useful comparison is between the household’s current aim and the complete offered arrangement for its own property.
Build a later record from what was actually completed.
After the offered work is completed, keep photographs of the actual condition alongside the agreed scope and any provided product or care documents. Use the labeled viewpoints where practical and identify changes in framing or surroundings. Do not substitute a generated scene, another customer’s house or an altered image for the completed property. If something remains a question, record it directly instead of hiding it in the comparison. Start a new enquiry with Accent by naming the service and desired change, adding a wide current photograph and one or two clearly explained references. Keep the honest starting record throughout the conversation. It helps the household assess the particular work being offered and later describe the real result without turning planning imagery into evidence of an installation.
GOOD QUESTIONS. CLEAR ANSWERS.
Your before and after planning questions.
Use these answers alongside the assessed conditions and choices for your own property.
YOUR PROJECT · YOUR NEXT STEP
Turn your project ideas into a clear next step.
Share your project and city or ZIP. Accent can discuss the existing space, your priorities and the details needed for an estimate.
- Share your project
A short request. Phone or email. No account needed.
- Review scope and estimate
Discuss the assessed work, materials, preparation and exclusions.
- Approve and plan the work
Confirm the agreed scope and installation arrangements with Accent.
Your request starts a conversation. You approve the work before installation.
